

With my teeth being one of my favourite features, I have become more and more frustrated in recent years with how yellow they've gotten. With all the coffee and wine I drink, brushing and flossing every day (yes I'm one of those people) isn't even enough. I've tried drugstore tooth whitening products and even looked into professional tooth whitening. These options either don't work or are far too expensive. With my aunt in Iceland being a dentist (enter the reason for my obsessive teeth cleaning), I always look into getting it done with her but I never visit back home long enough. So when Smile Brilliant reached out to me to collaborate, I was super excited. It was a chance to get the professional tooth whitening experience at home.
As you can see below in my 'before' picture, my main issue is yellowing on the edges of my teeth. The degree to how yellow really does vary from day to day. Some days they can be worse than this, and some days better, depending on what I've eaten/drank that day and how much colouring it had to it. The below pictures were taken in daylight (the yellow is even worse in dark/unnatural lighting) but I wanted to show a true representation on how big a difference there was. And these photos are obviously unedited (hence the cracks in my lips - please don't judge..... eeek!)
Before

After

How it works?
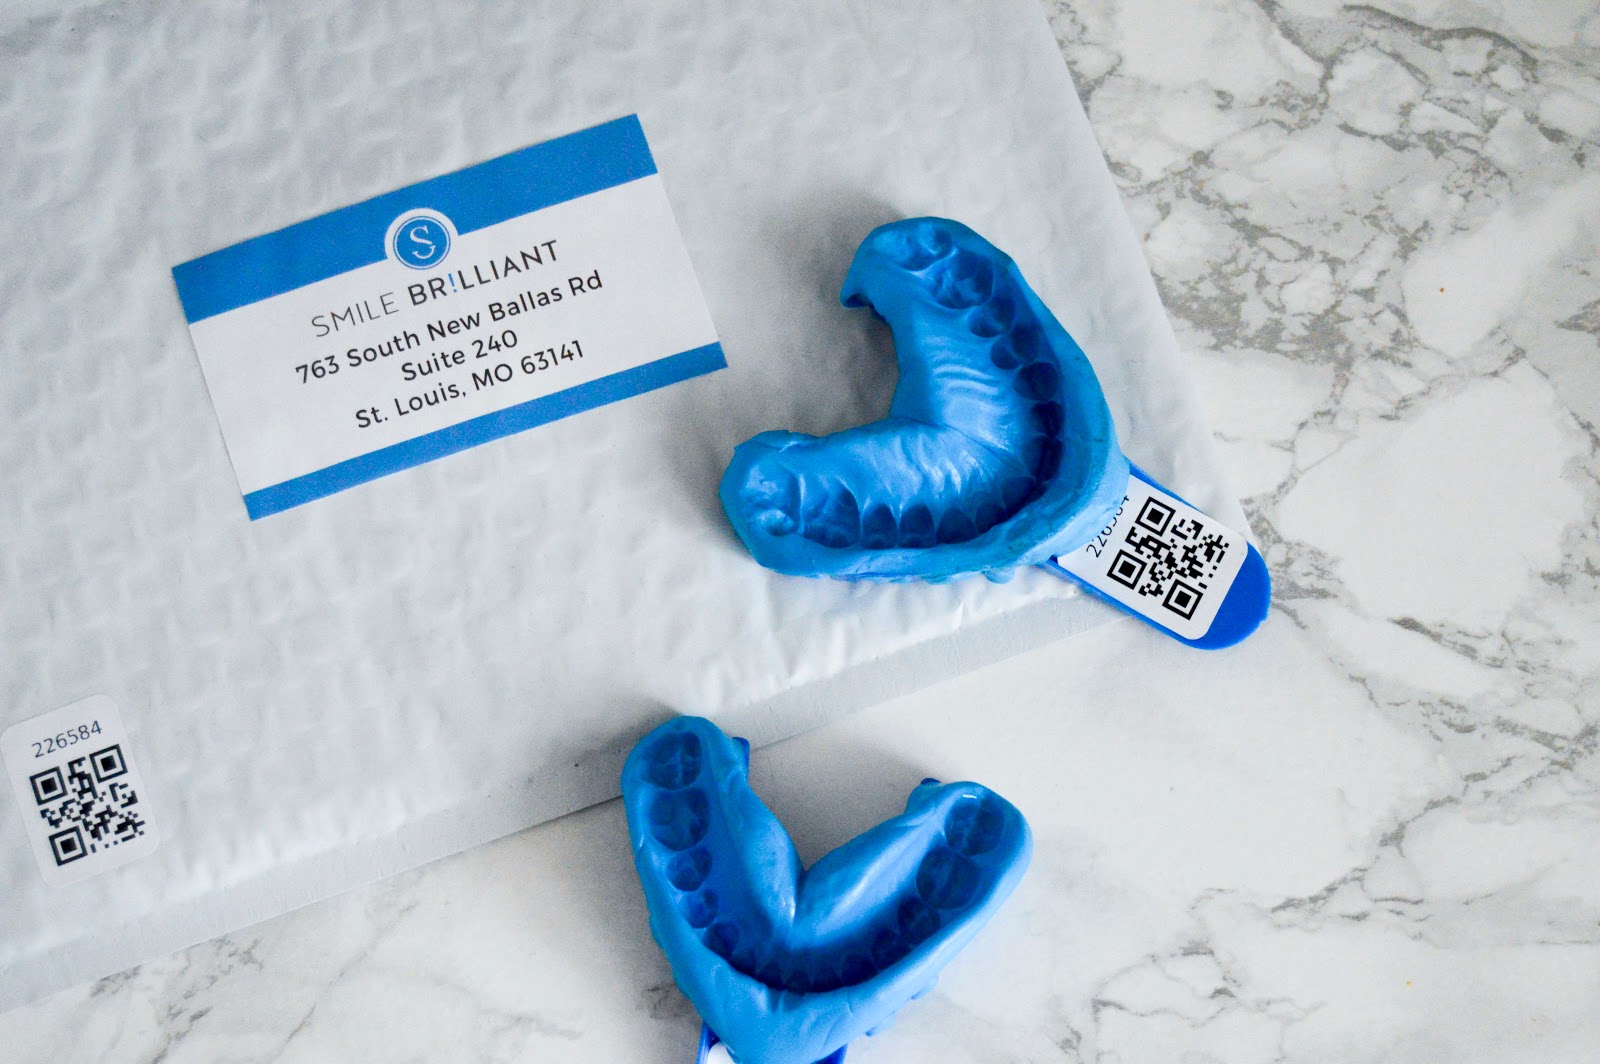
Your first package will contain the majority of what you need for the tooth whitening process:
-Base Paste, Catalyst Paste, Upper Tray & Lower Tray (all to create your mould)
-An envelope (to send your mould in)
-Tooth Whitening Gel
-Desensitising Gel

You will begin by making your mould in order to have your whitening trays created by Smile Brilliant. This is done by mixing the Catalyst and Base Paste (as quickly as possible, as it hardens!) and putting it into the tray. You will then place the tray onto your teeth and evenly press so that your teeth make an imprint. Repeat for your bottom teeth. Then let the tray sit for 30 mins and rinse with cold water. Pop both impressions with the return card into the envelope and mail to Smile Brilliant!
The trays will then be custom made for you and sent back within 5 working days.
Now onto the actual whitening. You will begin with the Whitening Gel. First, brush your teeth with no toothpaste and dry them as much as possible. Then open up your Whitening Gel and apply a thin line of gel along the front outer surface of the tray. Then pop onto your teeth and repeat with the other tray. Leave this on for 45 mins - 3 hours (maybe go shorter the first few times and/or if you have sensitive teeth, like me!) Once done, remove trays and brush teeth like normal.
Now on to the Desensitising Gel. This is to use after each whitening session. You will already have your teeth brushed (as above), so following that, you apply a thin line of the gel onto your cleaned tray and place onto your teeth. Again, try to dry them with a tissue or towel. Do the same with the other tray and leave on for 15-20 mins. Once done, remove your trays and spit out any excess gel.
And you're done!
After a few sessions, your teeth will be pearly white *flicks hair*
& Here's a video explaining Smile Brilliant and how to use it: How I Whitened My Teeth at Home
Tooth Sensitivity
I was initially quite nervous about using tooth whitening products because I have quite sensitive teeth, as I discovered when using all the various drug store products in the past. This article by Smile Brilliant gave me tips on reducing this issue.
Discount Code
If you guys would like to try out Smile Brilliant, make sure to use my discount code to receive 5% off your purchase: heimisdottir5
GIVEAWAY
I have teamed up with Smile Brilliant to give one lucky winner $139 credit for tooth whitening products on their site!
The giveaway is open for one week (until 7th May 2017). You MUST enter through the link below to be counted. Giveaway is for $139 credit & is open to USA, UK, Canada, and Australia residents*
Link: www.smilebrilliant.com/g/heimisdottir
Let me know if you try out whitening your teeth by tagging me in your pics on Instagram! & let me know if you've entered into the giveaway by commenting below :)
Until next time lovelies,
H x
Twitter: H_Heimisdottir | Instagram: habbaheimisdottir | YouTube: Habba Heimisdottir
Great! I'm on it :)
ReplyDeleteYay :)
DeleteOoh wow! Your teeth look great :) x
ReplyDeleteThanks hun x
DeleteOh wow! Love the results! Definitely make the smile look more confident!
ReplyDeletexo, Claire | VONVOGUE.COM
Thanks Claire! Yeah I love it :) x
DeleteBeautiful teeth! Looks like you had great results.
ReplyDeleteAmy Ann
Straight A Style
Thanks so much hun :) xx
DeleteI'm posting my collaboration with them tomorrow, loved Smile Brilliant and your post!
ReplyDeletehttp://www.myclusterofthoughts.com/
Yay that's so cool :) I'll defo check out your post xx
DeleteInteresting post! Such a great difference!!
ReplyDeletexx
Mónica Sors
MES VOYAGES À PARIS
NEW POST: CITY OF STARS
Thanks Monica :) x
DeleteI can definitely see a difference! Your smile looks amazing :)
ReplyDeleteNati xx
www.simplyartdicted.com
Thank you Nati :) I love the results! X
DeleteI actually noticed your beautiful eyes and those gorgeous lashes at first glance :) Wow such a difference on your teeth! Now I'm tempted to try! xx
ReplyDeletehttp://www.crystalchiffon.com/
Aww thank you Angela :) Yeah you should! Let me know if you enter the giveaway! x
DeleteYour teeth look amazing! I have to give this a try!
ReplyDeletexo
Siffat
http://icingandglitter.com